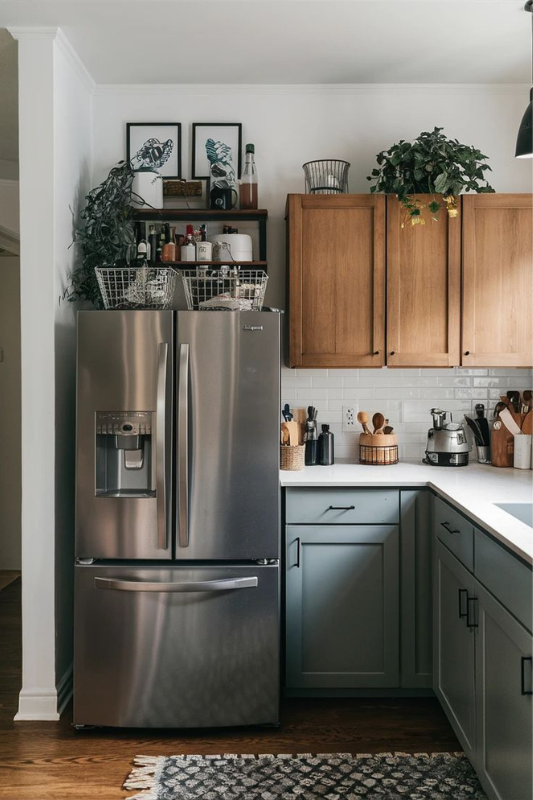
Fridge Decor Ideas: How I Styled the Top and Front of My Fridge
Fridge decor ideas can make one of the largest features in your kitchen feel much more intentional. While countertops, shelves, and cabinets usually get most of the attention, the refrigerator can quickly become a collection point for magnets, appliances, and miscellaneous items.
That was exactly what had happened with ours.
A microwave sat on top of the refrigerator with a few loose items around it; the front was covered with travel magnets, and there was an old sticker on the lower door. Nothing was terrible on its own, but together the area looked busier than I wanted.
I decided to try a few simple fridge decor ideas using things we already owned. Instead of removing all the character from the refrigerator, I wanted to clean it up, organize the travel magnets, and make better use of the space on top.
The makeover was simple: remove everything, clean the fridge properly, sort the magnets, create a more intentional display, and replace the microwave with a styled rattan tray.
Here is how it came together.
1. Starting With a Cluttered Fridge
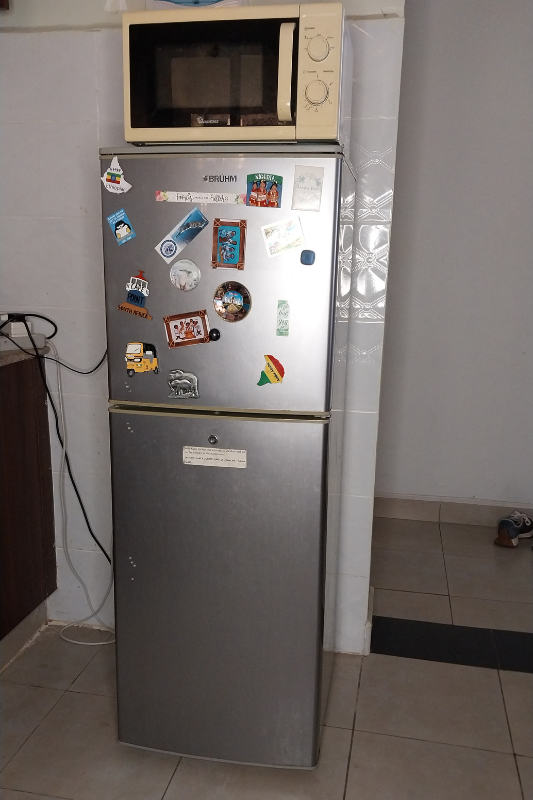
I wanted to find simple fridge decor ideas that would keep the travel memories while making the refrigerator look less cluttered.
Before changing anything, I took a photo of the fridge exactly as it was.
The microwave was the first thing I noticed. Because it occupied most of the space above the refrigerator, the entire area felt visually heavy. A few additional items had also accumulated around it, which made the top look more like overflow storage than part of the kitchen.
The front had its own issue.
Over time, we had collected travel magnets from places including Ethiopia, Nigeria, South Africa, and other destinations. I actually wanted to keep these because they represent places and experiences rather than being random decorations.
The problem was simply that there was no clear arrangement.
There was also an old sticker on the bottom refrigerator door that I no longer wanted.
Instead of moving a few things around, I decided it would be easier to start from scratch.
2. Removing Everything From the Fridge
The first step was to clear everything.
I removed the microwave and everything sitting on top of the refrigerator. Once the microwave was gone, the space immediately felt much more open.
Next, I took every magnet off the doors.
Removing everything rather than rearranging pieces in place was useful because it gave me a completely blank surface to work with.
It also made it much easier to see how much visual space the refrigerator actually had.
If you are wondering how to decorate a fridge that has gradually become cluttered, this is a good place to start. Take everything off first and decide what deserves to come back later.
3. Cleaning the Fridge and Removing the Old Sticker
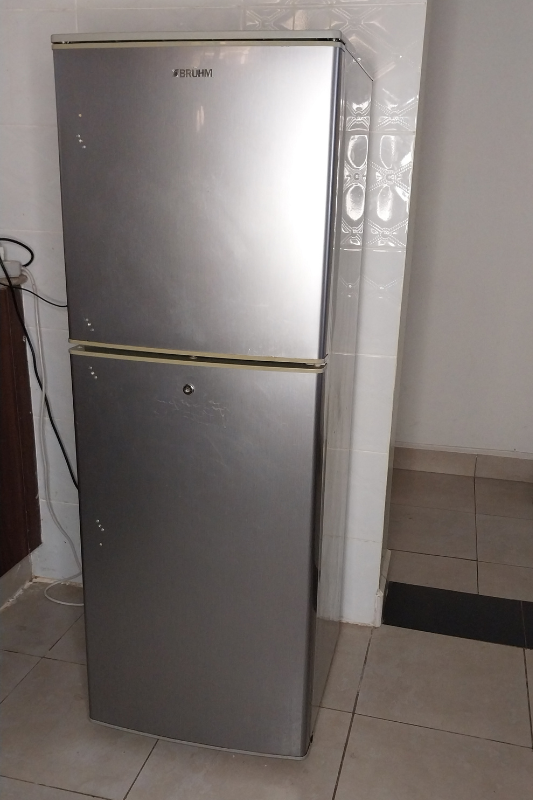
With the refrigerator empty, I could finally give it a proper clean.
I wiped down the doors to remove fingerprints, small stains, marks, and dust that had accumulated around the magnets.
Stainless-steel refrigerators can look completely different after a good wipe because even minor smudges become noticeable across such a large surface.
I also removed the old sticker from the lower door.
This was a small detail, but it mattered because I planned to leave that section of the fridge undecorated. Once the sticker was gone, the bottom door became a clean visual break from the more colorful display I was planning above.
I finished by wiping the top of the refrigerator before placing anything new there.
Now I had a proper blank canvas.
4. Sorting the Travel Magnets
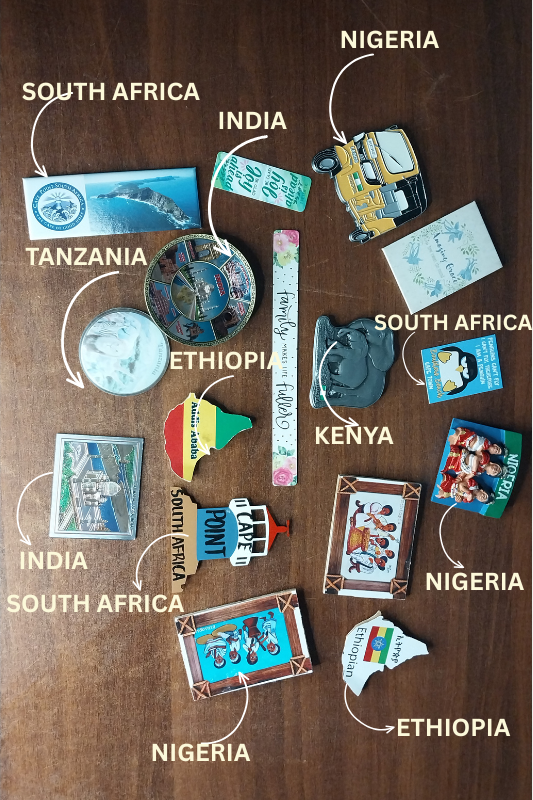
Before putting the magnets back, I laid them out and sorted through the collection.
Travel magnets are colorful by nature. They come in different shapes, sizes, styles, and finishes, which is part of their charm but can also make a refrigerator look crowded if everything is placed randomly.
I decided to keep the magnets that had meaning and use them as the main decoration on the front of the fridge.
This was also a good opportunity to leave out anything I no longer wanted to display.
You do not necessarily have to throw those pieces away. If you have a large collection, you could rotate your travel magnet display occasionally instead of putting everything on the refrigerator at once.
5. Fridge Magnet Decor: Arranging the Upper Door
One of the easiest fridge decor ideas for a two-door refrigerator is to keep the decorative display on one door and leave the other more visually quiet.
Because our refrigerator has two separate doors, I decided to use only the upper door for the magnets.
The lower door would stay clear.
This was probably the most important styling decision in the makeover.
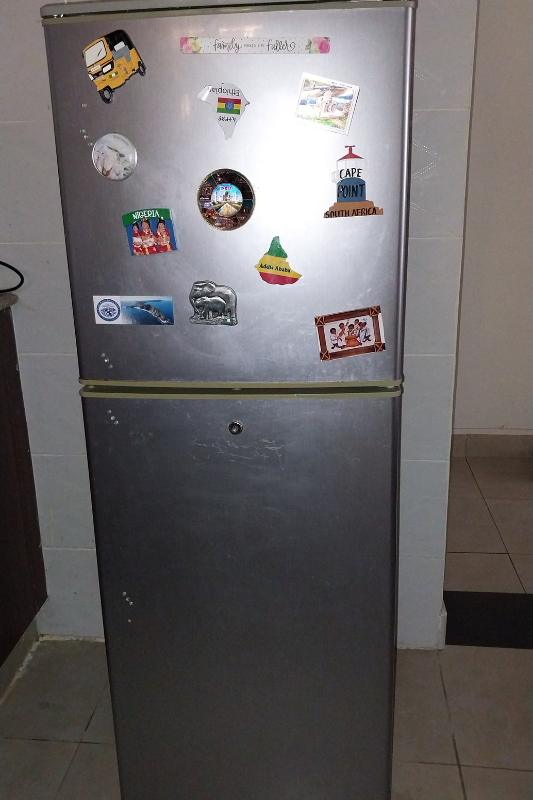
Instead of allowing colorful magnets to run down the entire refrigerator, keeping them within one defined area makes the collection feel deliberate.
The bottom door then provides enough empty space to balance everything above it.
For the actual fridge magnet decor, I did not try to create a perfect grid. The magnets are too different in shape and size for that to feel natural.
Instead, I arranged them loosely across the upper door, using some of the larger magnets as anchor points and placing smaller ones around them.
I also left visible gaps between the pieces rather than filling every empty space.
That breathing room makes it easier to notice individual magnets and keeps the upper door from feeling overcrowded.
If you have a two-door refrigerator and a large magnet collection, this is an easy approach to try: choose one door as your display area and let the other stay relatively simple.
6. Top of Fridge Decor With a Rattan Tray
Once the front was finished, I moved on to the top.
Instead of replacing the microwave with several loose decorative items, I used a large rattan tray that I already owned. A tray works well for top-of-fridge decor because it brings several smaller pieces together and makes the arrangement feel intentional rather than scattered.
At the back, I placed a wooden perpetual calendar. As the tallest piece, it adds height and creates a natural focal point.
On one side, I added a small woven lidded basket for storing keys. The lid keeps them out of sight while still making them easy to reach when needed.
On the other side, I used a green leaf-shaped decorative tray to group a glass jar candle and a small faux succulent in a white pot. The greenery softens the arrangement, while the candle adds another layer of texture.
I also included a rust-colored ceramic catchall dish. Its warm tone works nicely with the natural rattan and wood while giving me another practical spot for small everyday items.
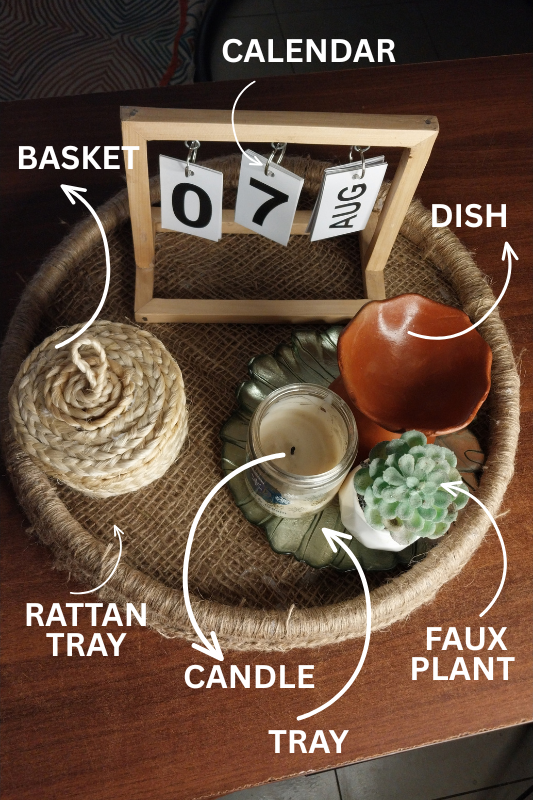
- Wooden perpetual calendar
- Small woven lidded basket — for storing keys
- Green leaf-shaped decorative tray
- Glass jar candle
- Small faux succulent in a white pot
- Small rust-colored ceramic catchall dish
Together, the different materials- rattan, wood, ceramic, glass, and greenery give the display interest without needing lots of decor.
I experimented with adding more items, but the tray looked better once I removed the extras. One useful lesson with tray styling is that you do not need to fill every inch of the surface. Leaving some of the woven base visible helps the arrangement feel lighter and less cluttered.
Since the tray will sit on top of the refrigerator, I would also keep the candle purely decorative rather than lighting it there.
7. Placing the Rattan Tray on Top of the Fridge
Among the fridge decor ideas I tried, replacing the microwave with one styled tray made the biggest difference to the top of the refrigerator.
The last styling step was placing the finished tray on top of the refrigerator.
This made a much bigger difference than I expected.
Without the microwave, there was more open space above the fridge, and the natural texture of the rattan made the area feel warmer.
It also works well with the rest of our kitchen.
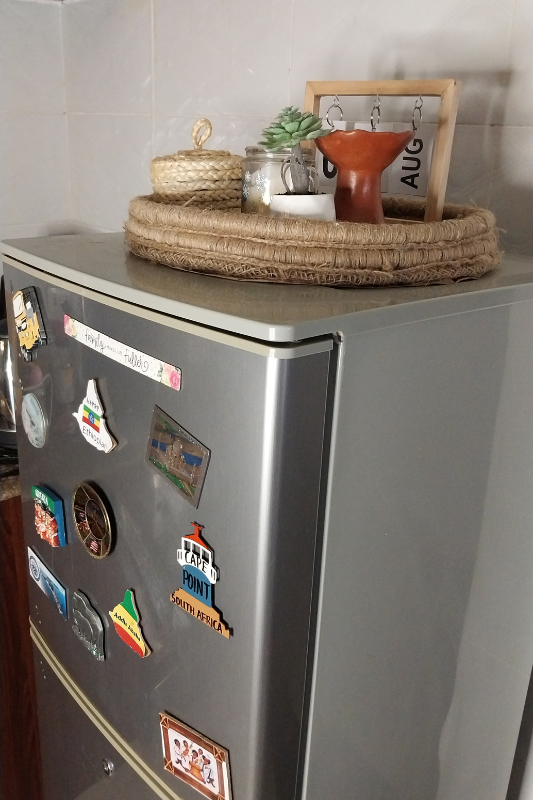
The refrigerator has a cool stainless-steel finish, while the surrounding cabinetry has warmer wood tones. The rattan helps connect those two finishes without needing to match them exactly.
Because the travel magnets already add quite a lot of color to the front, I kept the refrigerator top decor relatively neutral.
This balance is important.
If one area of your fridge already has plenty of visual interest, you do not necessarily need to create another busy display above it.
One tray with a few useful and decorative items may be enough.
Before putting anything on top of your own fridge, it is also worth checking the manufacturer’s guidance for ventilation and clearance.
8. The Finished Fridge Decor Ideas: Before and After
The finished refrigerator still feels personal, but it looks much calmer.
The travel magnets are still there because I wanted to keep the memories attached to them. They simply have a defined home on the upper door now.
The bottom door is clean and almost completely bare, which balances the colorful magnet display.
At the top, the microwave and loose items have been replaced by one rattan tray holding a calendar, a woven key container, a small plant, and a candle.
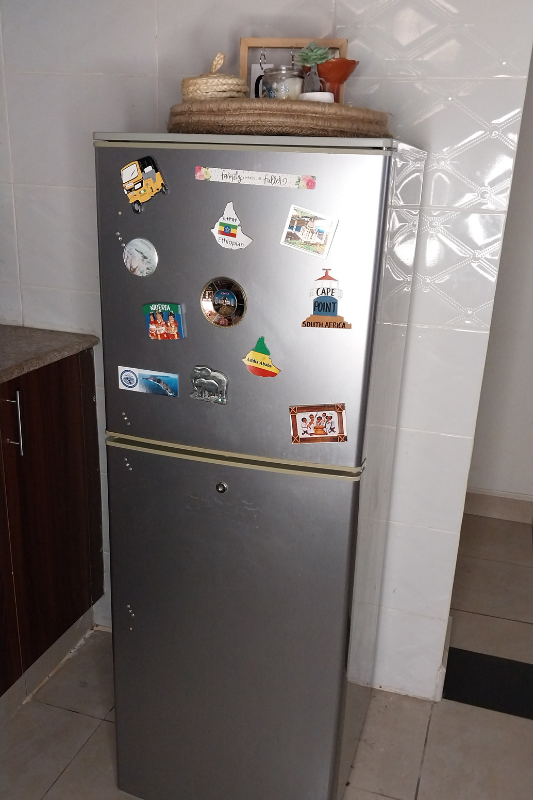
Just like styling a kitchen countertop, the goal is to balance practical pieces with enough empty space so the area does not feel overcrowded.
What I like most about this makeover is that I did not have to buy a completely new set of kitchen accessories to make a difference.
Most of the improvement came from removing things.
I cleaned the refrigerator, got rid of the sticker I no longer wanted, edited the magnet collection, gave the magnets one specific display area, and used a tray to organize the top.
Sometimes the simplest refrigerator decor ideas are not about adding more.
They are about deciding what you already love, giving those pieces a proper place, and allowing a little empty space around them.
Our fridge still looks like it belongs in a real home. The travel memories are still visible, the keys still have a practical place, and the calendar is useful.
These simple fridge decor ideas worked because I focused on organizing what we already owned rather than adding more accessories.
It just feels much more intentional.